How does a clutch work on a go-kart?
While installing or removing your go-kart clutch, you might have thought,” How does this thing works” or “why do I need this” or maybe you are looking to modify the clutch for better performance, and learning how they work is a good place to start.
Centrifugal clutch is one of the 2 popular transmissions used in go-karts along with torque converters, which uses centrifugal force and friction force to transmit power from the engine to the wheel.
Parts:
The clutch can be divided into 2 parts:
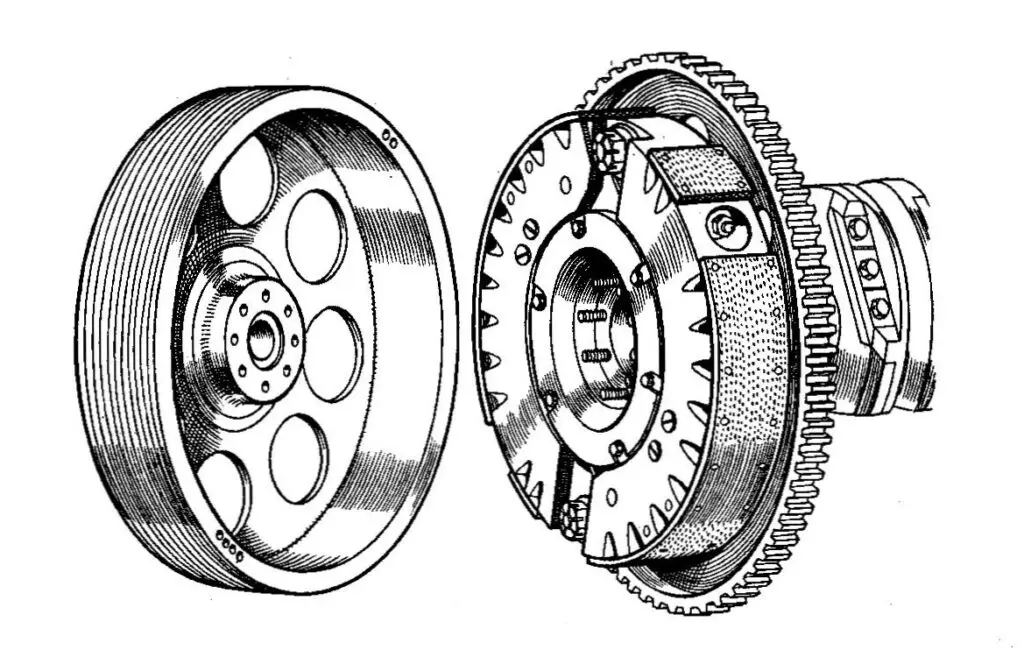
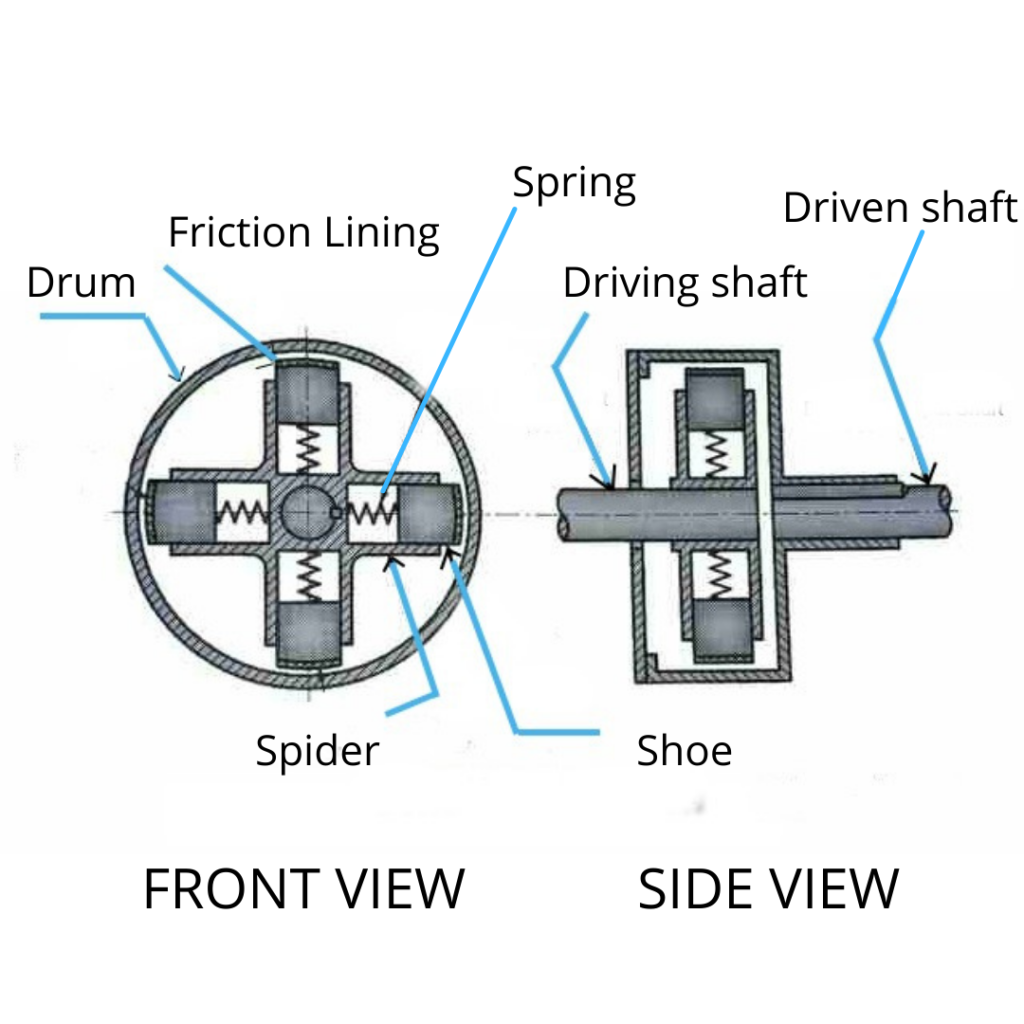
The drum part is the one on the left side of the first image. Other than that, the clutch contains shoes, springs, and friction lining at the end of the shoes. The drum is connected with the driven shaft while the springs, spiders, and shoes are connected with the driving shaft.
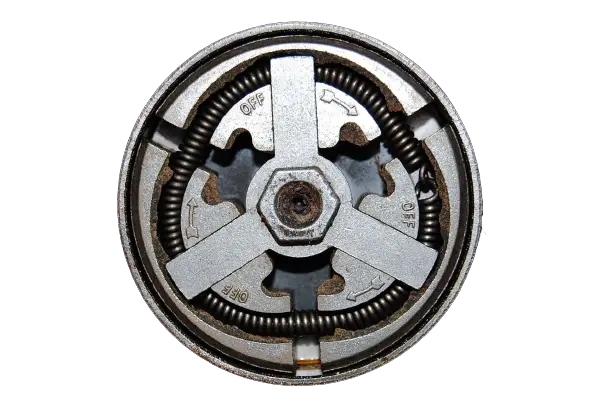
On Go-kart clutches, the springs are circular instead of the ones in the diagram, but they are all based on the same principle. The clutches on minibikes and go-karts look similar to this on the inside:
How it works?
When the crankshaft in the engine starts to rotate, the driving shaft starts to rotate along with it.
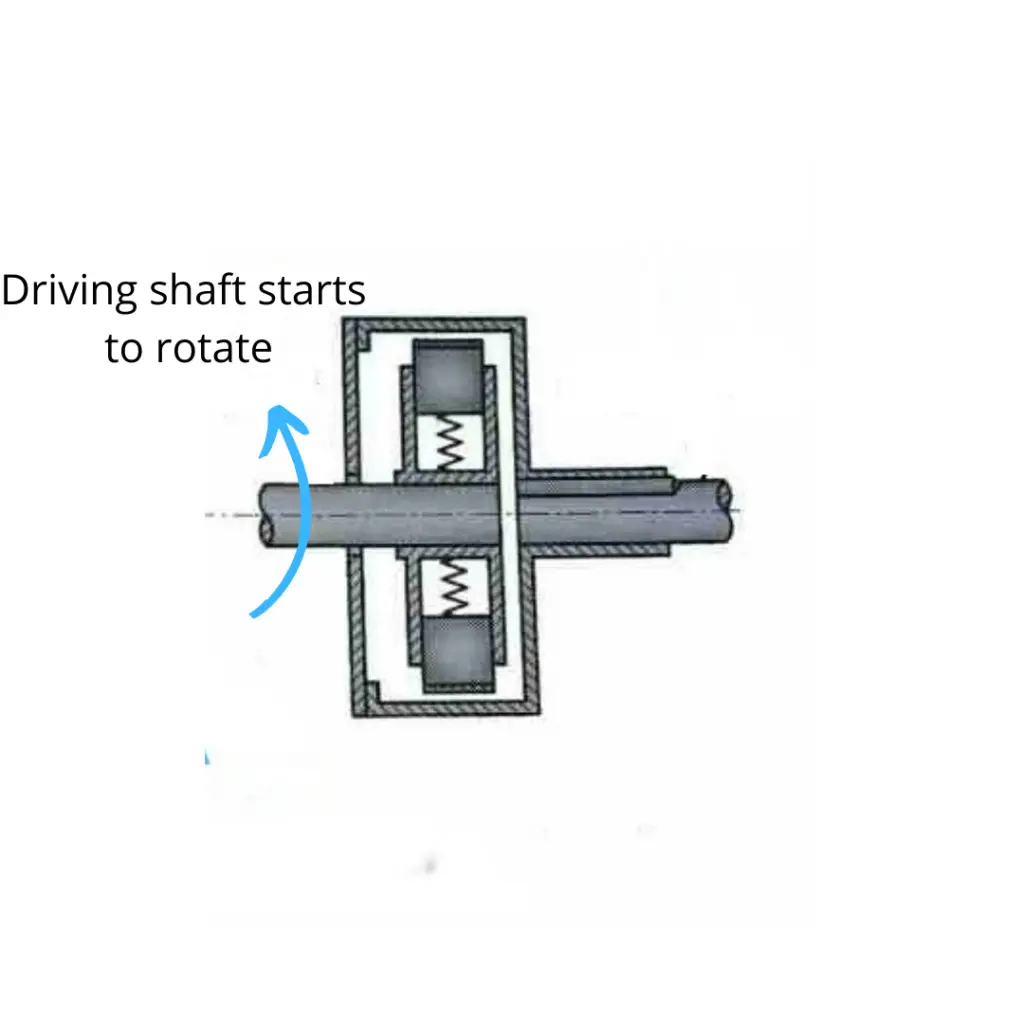
The driving shaft is connected with the shoes with the help of spiders and springs, so the shoes start to rotate along the axis of the shaft.
Once the shoes start to rotate, they will have a centrifugal force in the direction opposite to the spring force and will move outwards while stretching the springs.
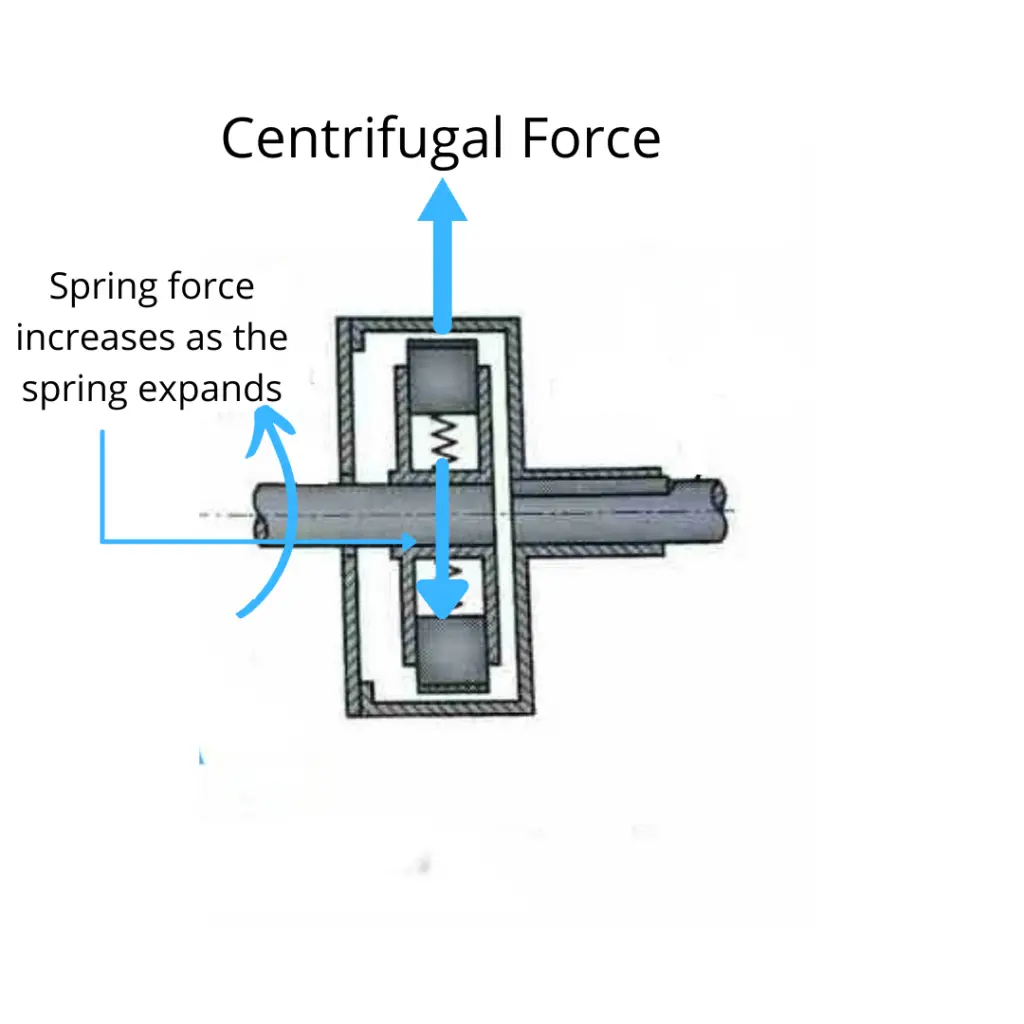
Consequently, the spring will apply spring force on the shoes in the direction opposite to the centrifugal force, and as it expands more and more, the spring force will keep on increasing.
When the Engine rpm is high enough for the centrifugal force to be greater than the spring force, the shoes will move outwards until the 2 forces balance out. But at some rpm, the shoes will engage with the clutch’s drum.
The shoes have friction lining at the end of the surface, when they come in contact with the drum, they will apply friction force on the drum, making the drum and the sprocket move.
The diagrams used to explain might not be how your clutch looks when you take this apart. But the working principle is the same.

More likely your clutch has a circular spring and the shoes are surrounding the spring.
Similar to the clutch with 4 springs that we saw, this clutch works on the same principle, as the Engine shaft rotates, the shoes start to rotate along with the spring.
Then the spring expands due to centrifugal force and develops a spring force in the opposite direction.
Finally, the drum starts to rotate due to friction force due to the shoes and the sprocket starts to rotate and your go-kart starts to move.
Advantages and Disadvantages:
Advantages:
- Cheap
- Low maintainace
- Very simple construction
- Fully Automatic
Disadvantages:
- Slipping
- A lot of heat generated
How to modify the Centrifugal clutch for your Go kart:
If you’ve got a good quality clutch like Max Torque’s clutch then there are a few modifications you can make.
1. Increasing the pressure points:
Your clutch will come in with 6 shoes installed, that is 6 pressure points on the Engine drum when it engages with the shoes. You can increase the pressure points to 9 by cutting 3 of the shoes in half.
A few things to keep in mind:
a) Only cut 3 shoes, the ones that are not covering the holes.
b) Blunt out the sharp edges of the shoes before you put them back together in the clutch.
2. Adjusting the go kart clutch for higher RPM:
If you want your Engines to engage at a higher rpm, then you’ll have to shorten the springs.
If the springs are in the circular form then you can cut 2-3 loops from the open end, but do keep in mind, if you shorten it too much then it will be really hard to reassemble the clutch.
When you shorten the spring, the centrifugal force at which they will engage increases. If you shorten it too much and your engine is not modified then the clutch might never engage, so 2-3 loops are enough until you upgrade your engine.
How to adjust a centrifugal clutch for higher RPM:
1. First remove your clutch from the go-kart or minibike
2. You’ll see a snap ring that holds the drum of the clutch to the other half of the clutch, remove that snap ring with a snap ring plier
3. You’ll find a washer/spacer between the drum and the cover of the other half of the clutch. Make sure to not lose that washer.
4. If there is another snap ring, you’ll need to remove that too.
5. Now you’ll be able to see the spring after you’ve taken off the cover.
6. Remove the spring.
7. Cut 2-3 loops from the open end.
3. Replacing the spring in the clutch:
Instead of cutting off some loops from the spring in your existing clutch, you can replace it altogether with a new spring. There are springs in the market with higher stiffness, meaning they will engage at a higher rpm. For example, Max-Toque has different colors of springs with the black one being the highest stiffness. According to how modifies your engine is, you can choose the spring on the basis of the rpm at which they engage.
All the modifications could have been a bit too confusing on the written form and it’s best to watch some videos on youtube to see the process, this video from the Max-Torque’s Factory does an amazing job.
